I got the question “What does the History brush tool do?”. I decided to do a tutorial on it, since it’s pretty simple to explain, and this is my first tutorial. In short: When you have a colour-photo which you want in black and white, sepia or want to use any other filter on the background and make 1 object stand out in colour. Here it goes.
Step 1)
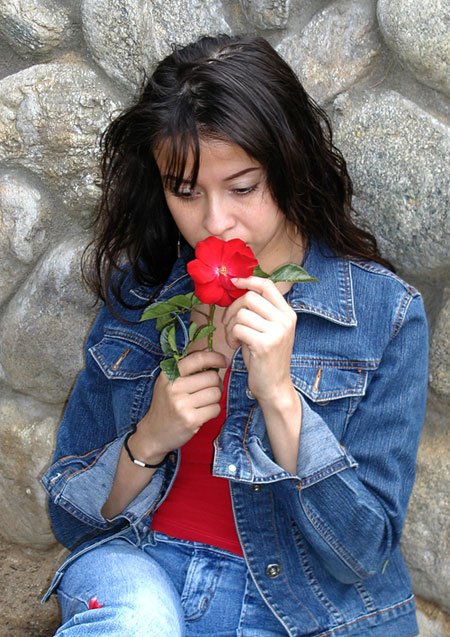
Open the file you want to edit. I took an image from Stock xchng for this tutorial. Remember: the bigger the better.
Step 2)
Turn it into black and white. Don’t use the grayscale method, but Image > Adjustments > Black and White. (or Alt + Ctrl + Shift + B).
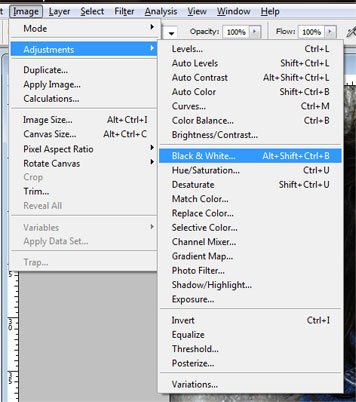
In the next screen I just clicked OK, but you can make adjustments if you want. Just drag the sliders to your taste.

Step 3)
History brush tool The fun part: Draw!
Take your History Brush tool and start drawing. Experiment with brush-sizes (on your keyboard the “[" and "]” keys), and start drawing the object you want to put the colour back in.
Step 4)
Save your file. You are done! Wasn’t that easy?
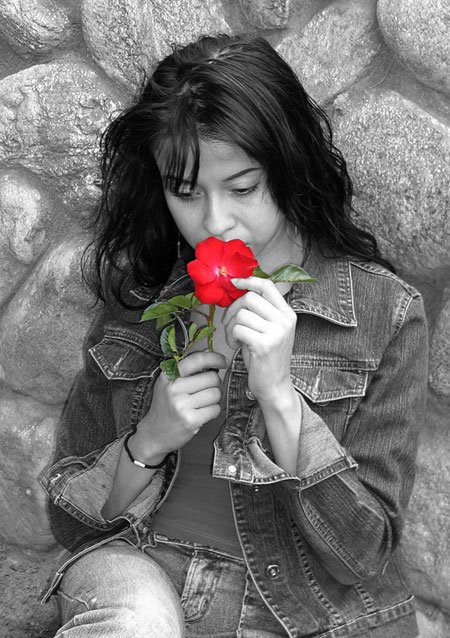
This is the after-image I created:
this doesnt help how u came up with the photo… hope u will be able to do it step by step…anyways, thanks for the tutorial.
@abi: Thanks for your comment, but what do you mean exactly? If you follow the steps in the tutorial , you’ll get the result of the last image.
There used to be an image for the history brush-icon in this tutorial. Don’t know what happened to that one, but you can use that as a brush. Experiment with it, and you’ll soon find out how exactly to use it.
Thanks again,
Mark