Organize layers
At one point, when working in Photoshop, you will have huge number of layers in one document. If you don’t keep your layers organized, it’s very hard, almost impossible, to easy find a layer you want to work on.
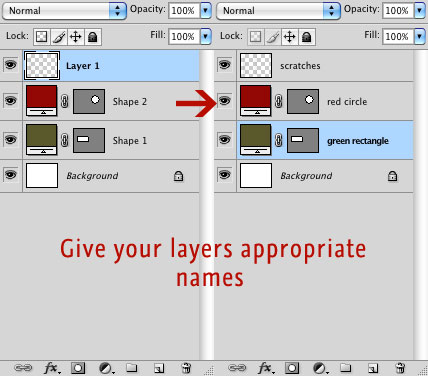
Always give your layers appropriate names.
Group your layers. Highlight layers you wish to put in the same Group folder, and then press Command + G (Ctrl + G if you are using PC) on the keyboard.
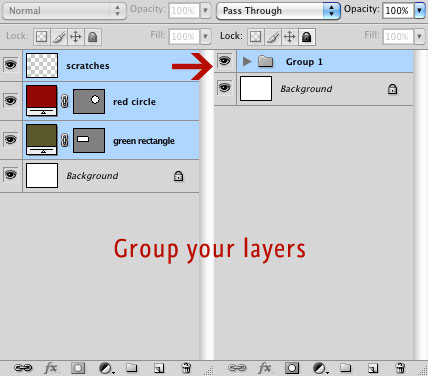
Also give appropriate names to a group.
Change Brushes without leaving canvas
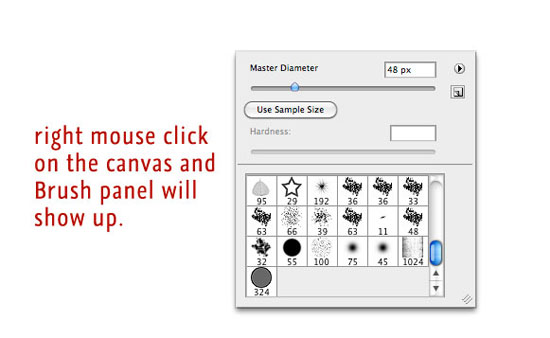
When working with Brush Tool (B), right mouse click on the canvas and Brush panel will show up.
You can change the size of the brush simply by pressing brackets on keyboard. Simple press on the “]” or “[” will adjust brush size by 10 units.
Turn Brush into Eyedropper Tool simply by pressing Alt on the keyboard.
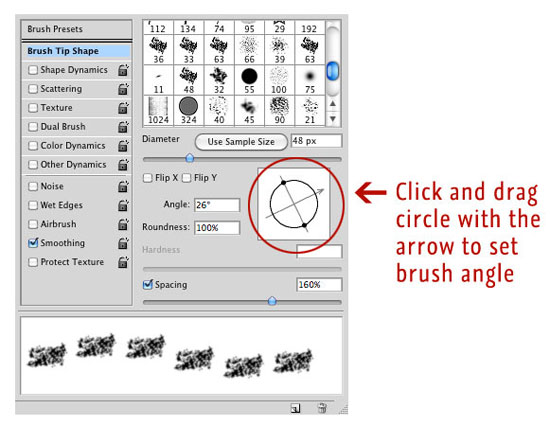
Rotate Brushes
To rotate, select a brush, go to Window > Brushes (F5), click on Brush Tip Shape and it will open window with hidden possibilities. Click and drag circle with the arrow to set brush angle.
Invoke Reset Button
When you are in Photoshop dialog (Layer Style, Color Picker, …), press Alt key and Cancel Button will change to Reset Button.
Zoom and Pan using Keyboard
To Zoom In hold Command + Alt + “+” (Ctrl + Alt + “+” on PC) on the keyboard, to Zoom Out hold Command + Alt + “-” (Ctrl + Alt + “-” on PC) on the keyboard.
Command + 0 (Ctrl + 0 on PC) will Zoom Out to fit the whole image to your screen. Command + 1 (Ctrl + 1 on PC) will Zoom Out to 100%.
Press and hold down the Spacebar, the hand icon will appear on the screen, allowing you to move around your canvas.
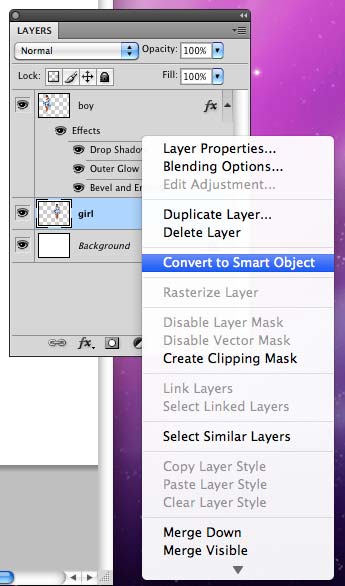
Use Smart Objects
Smart Objects are layers that contain image data from raster or vector images. You can scale, rotate, skew, distort, perspective transform, or warp a layer without losing original image data or quality. To convert image to a Smart Object, right click on image layer and choose Convert to Smart Object.
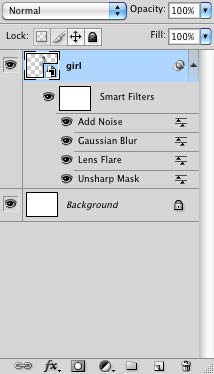
Filters applied to Smart Object become Smart Filters, and it can be edited in any time.
Note that: Operations that alter pixel data (i.e. painting, dodging, burning or cloning) can’t be performed on Smart Object. It needs to be converted to regular layer first, to perform this operations.
Move Layer Styles from one to another layer
You can move Layer Styles from one to another layer, simply by going to the layers palette and drag and drop the style onto the layer you want to apply it to.
Move Text Without Leaving The Type Tool
When the text tool is active, move the cursor away from the text and it will change to the move tool icon. Click and drag text to a wanted position.
Change Blend Modes with Keyboard only
To change blend modes quickly use Shift + “+” (same on the PC) to change to the next mode, and Shift + “-” (same on the PC) to change to the previous mode.
This will not work if blend mode is highlighted in menu. Press ESC key once and then try.
If painting tool is active, this shortcut will change the blend mode of the painting tool.
Fill layer with foreground or background color using keyboard
To fill layer with foreground color just press Alt + Backspace (Alt + Backspace on PC). To fill layer with background color press Command + Backspace (Ctrl + Backspace on PC).
To switch between foreground and background color press X on the keyboard.
To reset foreground and background color, to black and white, press D.
To pick foreground color with Eyedropper, invoke Eyedropper Tool by pressing I, then choose color. To pick background color with Eyedropper, invoke Eyedropper Tool by pressing I, press and hold Alt on keyboard and choose color.